


The fastest reliable way to embroider a name is backstitch for block letters and split or stem stitch for a flowing script. All three sit cleanly on fabric and stay legible at small sizes. You need a needle, a small hoop, DMC stranded cotton, and a tear-away stabiliser to stop puckering. Save machine embroidery or a professional service for workwear, uniforms, or anything ordered in bulk.
TL;DR:
- Using tear-away stabiliser for woven fabrics and cut-away for stretch materials ensures smooth, puckering-free embroidery of names.
- Backstitch works best for block letters, while split stitch and stem stitch are more suitable for curved and cursive lettering, respectively.
- Keep letter size at least 1cm for hand-stitched names and 0.25 inches for machine embroidery to maintain readability and definition.
- Professional embroidery services are more cost-effective and consistent for bulk orders, heavy wear items, or when a mock-up approval process is needed.
- Practicing on scrap fabric helps improve stitch consistency and tension, which are critical for clean, legible, and durable embroidered names.
Table of Contents
- Materials and tools you need for name embroidery
- Which stitches work best for lettering?
- How do you choose a font and transfer it onto fabric?
- Two step-by-step name embroidery projects
- Finishing and caring for your embroidered name
- When does a professional embroidery service make more sense?
- Design ideas for personalised name embroidery
- The gap between embroidery tutorials and what actually works
- Ready to personalise your own items?
- Sources
- FAQ
Materials and tools you need for name embroidery
Personalised name embroidery starts with four things: thread, needle, hoop, and stabiliser. Get these right and the stitching itself becomes far easier to control.
DMC stranded cotton is the standard choice for hand-lettering, and for good reason. It comes as six loosely twisted strands you can separate and recombine, so one skein gives you multiple thread weights. Use a single strand for fine script under 1cm tall, two strands for most block letters, and three strands only when you want a bold, chunky outline that reads from a distance. This flexibility is why DMC cotton is widely recommended for custom name stitching over pre-twisted alternatives, which don’t split as cleanly.
Needle size matters more than most beginners expect. A size 7 or 8 embroidery needle handles most cotton and linen projects. Knits and jersey fabric need a different approach entirely: use a ballpoint or a specific embroidery needle designed for stretch fabric, since a sharp point can snag and pull the weave, leaving small holes around each stitch.
Hoop choice depends on the name’s length, not just the fabric. A 4-inch hoop suits a short first name on a small item like a bib. Anything longer than about eight letters, or a full name with a surname, usually needs a 6-inch hoop or an oval frame so the whole word sits inside the tensioned fabric at once. Repositioning a hoop mid-name is the single most common cause of uneven letter height.
Stabiliser is where most beginners cut corners, and it shows. Fabric that puckers around stitched letters almost always means no stabiliser or the wrong type was used underneath.
- Tear-away stabiliser suits woven cotton and linen. It rips away cleanly once stitching is finished.
- Cut-away stabiliser works better on knits, jersey, and stretch fabric, because tear-away can distort over time on garments that flex with wear and washing.
- Water-soluble topper goes on top of towelling, fleece, or anything with a raised nap, stopping stitches from sinking into the pile.
- Layering a stabiliser is sometimes worth doing on very stretchy fabric: a cut-away base with a water-soluble topper gives support from both sides.
For sourcing, most craft shops stock DMC ranges and basic stabiliser sheets, and online suppliers sell multipack bundles that work out cheaper per skein. A full starter kit, thread, needles, a mid-size hoop, and a stabiliser sheet typically costs a modest amount, varying with the number of colors purchased. That’s the entire budget for several name projects, not just one.
Which stitches work best for lettering?
Four stitches cover almost every name embroidery project you’ll attempt: backstitch, split stitch, stem stitch, and satin fill. Each suits a different letter style, and mixing them incorrectly is where most hand-lettered names start looking amateurish.
Backstitch is the workhorse for block capitals and simple sans-serif names. Backstitch is ideal for clear, readable lines because every stitch loops back into the last one, leaving no gaps along the outline.
- Bring the needle up at point A, a short stitch length ahead of where you want the line to start.
- Insert it back down at the very start of the line, then bring it up again one stitch length further along.
- Keep repeating, always inserting the needle back into the end of the previous stitch.
- Keep every stitch the same length, roughly 2 to 3mm for small lettering, so the line reads evenly.
Split stitch handles curves that backstitch struggles with, think rounded letters like O, S, and C. You bring the needle up through the middle of the previous stitch, effectively splitting the thread, which lets the line bend smoothly around a curve without the stepped look backstitch gives on tight arcs.
Stem stitch is the better pick for cursive names, because it produces a slightly twisted, rope-like line that mimics the flow of handwriting far more convincingly than backstitch ever will. Work it by keeping the thread consistently to one side of the needle as you stitch forward, angling each stitch at roughly 45 degrees to the line. Consistency here is everything: switch which side the thread sits on halfway through a word and the rope texture visibly breaks.
Satin stitch fills a letter solid rather than outlining it, and it’s the stitch that separates a crisp result from a messy one. Lay parallel stitches close together across the width of the letter, angling them to follow the letter’s natural shape rather than stitching straight across. Two things ruin satin fill: stitching too loosely, which leaves gaps you can see fabric through, and stitching too densely on thin strokes, which causes the fabric underneath to pucker and cup. Avoid satin fill entirely on letters narrower than about 3mm wide; there simply isn’t room for clean coverage.
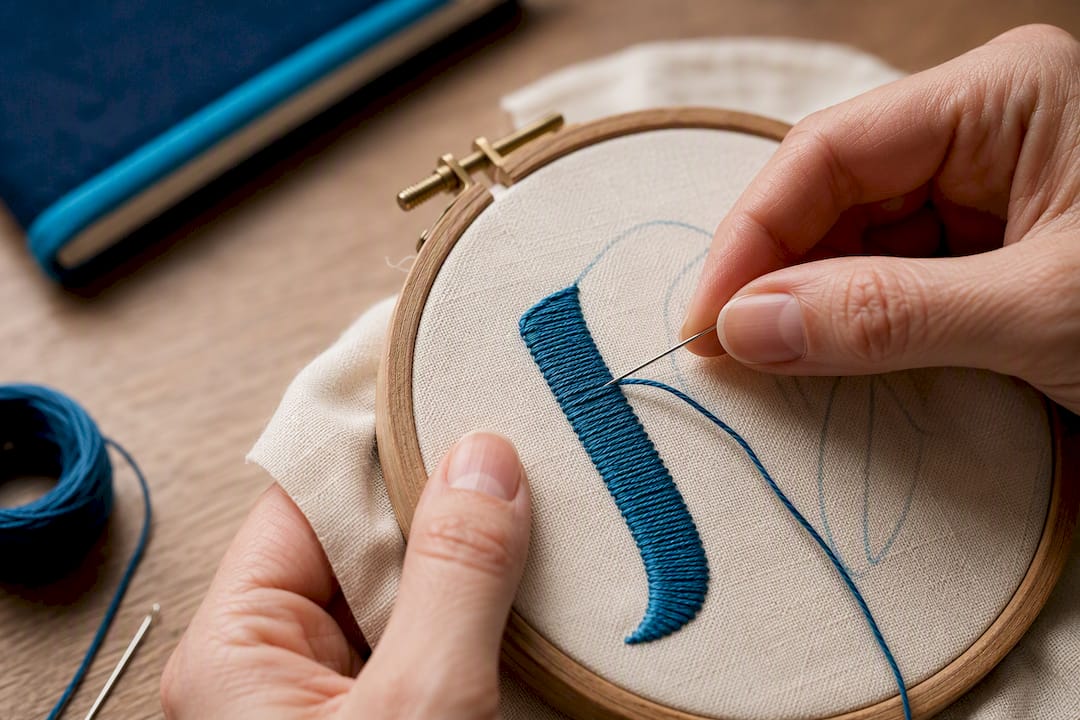
Pro Tip: Keep a scrap of the same fabric threaded onto a spare hoop and test your stitch tension before touching the real project. Five minutes of practice on scrap fabric saves an evening of unpicking.
Spacing and tension rules apply across all four stitches. Keep thread tension firm enough that stitches sit flat against the fabric, but loose enough that the fabric doesn’t dimple or cone inward, that slight give is what keeps lettering legible rather than distorted.
How do you choose a font and transfer it onto fabric?
Pick a font before you pick a transfer method, because the wrong font undermines every stitch you make afterwards. Smaller letters are significantly harder to stitch cleanly, and fonts with thin serifs or fine hairline strokes are the main reason why. A rounded, even-stroke font, similar to a basic sans-serif or a simple script without flourishes, holds its shape far better once thread replaces ink.
As a rule of thumb, keep hand-stitched letters no smaller than about 1cm tall for anything with detail, and closer to 1.5 to 2cm for names you want fully legible from a normal reading distance. Machine embroidery has its own minimum: letters should generally sit at or above 0.25 inches high to avoid losing definition, a useful benchmark even for hand work, since anything smaller risks the same stitch collapse.
Getting the design onto fabric accurately matters as much as choosing the font. A handful of methods work well depending on the fabric and your confidence level:
- Tracing with a lightbox or bright window works well on pale, lightweight fabric where you can see a printed template through it.
- Transfer or carbon paper suits darker or thicker fabric, tracing over a design to leave a faint line you stitch directly over.
- Water-soluble or heat-erasable pens let you draw freehand or trace confidently, and the marks disappear with water or a warm iron once stitching is done.
- Printable stabiliser lets you print a design straight from a computer, then stitch through the printed lines before tearing the stabiliser away.
- Temporary spray adhesive holds a paper template flat against fabric while you trace around it, useful for slippery or textured surfaces.
Positioning the name correctly avoids the most visible beginner mistake: text that drifts off-centre or letters that creep upward across the word. Measure the fabric’s midpoint first, then mark the vertical centre line lightly before placing the template. For multi-word names, measure the total width of the design and centre that whole block, rather than centring each word separately, which almost always throws off the balance.
Two step-by-step name embroidery projects
Reading about stitches only gets you so far. These two worked examples cover the two name styles you’ll meet most often: a block capital name and a flowing cursive name.
Project one: a block name
- Hoop the fabric with the stabiliser sandwiched underneath, pulling it drum-tight so there’s no give when you stitch.
- Transfer the design using your chosen method, checking the centring before you thread a needle.
- Anchor your thread with a small waste knot on the fabric surface a few centimetres from your starting point, or with two tiny overlapping stitches if you prefer not to use a knot at all.
- Outline every letter in backstitch, working one full letter before moving to the next rather than jumping between them, which keeps tension consistent.
- Fill with satin stitch if desired, leaving roughly 1 to 2mm of visible outline gap so the backstitch border stays crisp against the fill.
- Finish each thread by running the needle under several stitches on the back of the work rather than knotting, which sits flatter and won’t show through on lightweight fabric.
Project two: a cursive name
- Hoop and transfer exactly as above, but check the flowing outline traces smoothly with no jagged corners at letter joins.
- Outline the whole name in stem stitch, keeping the thread on the same side of the needle throughout so the rope texture stays unbroken from the first letter to the last.
- Switch to split stitch on tight curves, like the base of a lowercase “e” or the loop of an “l,” where stem stitch tends to look flattened.
- Smooth the joins between letters by overlapping the end of one letter’s stitching slightly with the start of the next, rather than stopping and restarting the thread at every gap.
- Check the whole word from a distance before finishing off, since flow and rhythm across a cursive name matter more than any single letter’s precision.
Two mistakes come up constantly with beginners. The first is inconsistent stitch length, which makes a line look shaky even when the tension is fine, fix it by counting stitches per letter rather than eyeballing length. The second is pulling thread too tight on curves, which causes the fabric to cup, fix it by loosening your grip and letting the stitch lie naturally rather than yanking it flat.
Pro Tip: Practise the full alphabet in a single stitch on a scrap swatch before starting a real name. It takes under half an hour and shows you exactly where your hand struggles, usually on S, G, and lowercase e.
Once you’re comfortable, a short practice drill helps build speed: stitch the same three-letter word five times in a row on scrap fabric, timing yourself. Most beginners cut their stitching time by roughly half after five repetitions, simply because the hand learns the rhythm.
Finishing and caring for your embroidered name
Finishing the back of the work properly is what separates embroidery that lasts from embroidery that unravels within weeks. Weave thread ends under four or five existing stitches on the reverse rather than knotting, since knots create small lumps that show through thin fabric and can work loose with washing.
Removing stabiliser needs a method matched to the type you used. Tear-away pulls off in sections, working from the outer edge inward and holding the stitching flat with a finger so you don’t drag on the thread itself. Cut-away needs small, sharp embroidery scissors to trim close to the stitch line without nicking it. Water-soluble toppers dissolve under a damp cloth or a light rinse, though you should let the piece dry fully before handling it further.
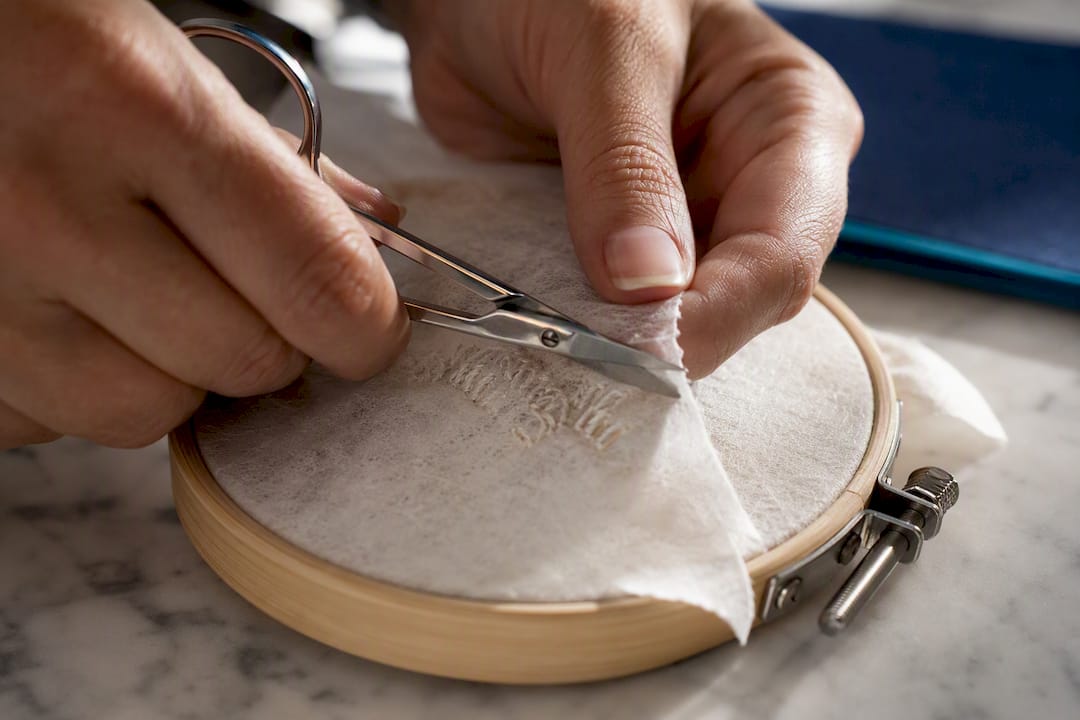
Pressing sets the finished piece without crushing the stitch texture. Place the embroidery face-down on a towel and press from the back with a warm, not hot, iron, this protects the raised texture of satin fill and stem stitch, which flattens permanently if ironed directly.
Washing and drying afterwards keeps the work looking sharp for years rather than months:
- Hand wash or use a gentle machine cycle in cold water where possible.
- Avoid fabric softener, which can dull stranded cotton’s sheen over time.
- Air dry rather than tumble dry, since heat is the main cause of thread shrinkage relative to the surrounding fabric.
- Iron from the reverse only, following the pressing method above.
Garments and flat items need slightly different finishing attention. A pyjama top or sweatshirt flexes constantly with wear, so cut-away stabiliser and reinforced anchor points matter more there than on something static like a cushion cover, which only needs to withstand occasional handling rather than repeated stretching. Hand embroidery holds up to repeated washing and heavy wear noticeably better than printed lettering, which is largely down to correct finishing rather than the stitching alone.
When does a professional embroidery service make more sense?
Hand embroidery suits one-off keepsakes: a christening gown, a memory cushion, a single personalised gift where the time investment is part of the value. It stops making sense once you need the same name repeated across multiple garments, or when the fabric is destined for heavy daily wear rather than occasional display.
Machine and professional embroidery exist for exactly that gap. Machine embroidery suits repeatable, high-volume work because digitised designs stitch identically every time, with no variation in letter height or tension from one item to the next. Getting there requires specialised software. Pre-digitised BX fonts already carry stitch paths, density, and underlay built in, which is a different skill set entirely from hand stitching.
The company has experience supplying personalised, branded workwear, with name embroidery commonly used for staff uniforms, team apparel, and bulk orders where consistency across garments is important. The embroidery techniques behind branded workwear rely on advanced machinery to keep letter height and thread colour identical across dozens or hundreds of items, something hand stitching can’t realistically match at scale.
A few signs point clearly toward ordering rather than stitching:
- You need the same name or set of names repeated across five or more garments.
- The item will see daily wear and needs machine-level durability rather than decorative stitching.
- You want a mock-up approved before committing thread to fabric, most professional services build this step in as standard.
- Turnaround time matters more than the process itself.
Eco-friendly garment options are available for businesses that want personalisation alongside sustainability, which may be worth inquiring about alongside the embroidery services. Adding names to workwear also does more than personalise: it reinforces how a team presents itself to customers.
Design ideas for personalised name embroidery
A first name in stem stitch across the corner of a pillowcase remains one of the simplest, most-requested keepsake projects, and it’s a genuinely good starting point precisely because the small scale forgives minor wobbles. Baby items are another obvious favourite: a name across the chest of a sleepsuit or the waistband of soft trousers turns a plain garment into a gift nobody else will duplicate.
Monogram embroidery designs offer a variation worth exploring once you’re comfortable with basic lettering. Three initials in a tighter cluster, often with the surname initial slightly larger in the centre, reads as more formal than a full name and suits items like towels or a keepsake blanket.
Combining a name with a small motif, a star, a heart, a simple flower, gives the design more presence without adding stitching complexity, since motifs are usually satin-filled shapes rather than intricate lettering. For anyone stitching a gift, pairing the recipient’s name with their birth month flower or a simple line drawing tied to a hobby adds a personal touch that a name alone doesn’t carry.
Thread colour choice matters more than most guides admit. A single dark thread on pale fabric reads as classic and legible from any distance, while two-tone lettering, an outline in one shade and a fill in a complementary tone, works well for names meant to stand out rather than blend in.
The gap between embroidery tutorials and what actually works
Most beginner guides treat every stitch as equally suitable for every letter shape, and that’s the advice worth ignoring first. Backstitch on a cursive script looks stiff and mechanical, no matter how neatly it’s executed, because the stitch itself doesn’t flow the way handwriting does. Matching stitch to letter style isn’t a nicety, it’s the difference between a name that reads as handwritten and one that reads as a printed label picked out in thread.
The other overlooked point is stabiliser. Tutorials spend most of their attention on stitches and barely mention what sits underneath the fabric, yet puckering ruins more first attempts than bad stitching ever does. Get the stabiliser wrong and no amount of stitch skill saves the result.
If you’re stitching a single keepsake, commit the time to learn stem stitch properly rather than defaulting to backstitch because it’s easier. If you’re kitting out a team or a family in matching personalised garments, stop treating hand stitching as the budget option, it isn’t, once you count hours against the reliability a professional service delivers at scale.
— Vinay
Ready to personalise your own items?
If you’d rather skip the hoop and thread altogether, Cwear turns your chosen name into finished embroidery without any of the trial and error covered above, and without the per-item time cost of doing it by hand. That matters most on baby items and cushions, where a single misplaced stitch on a hand-stitched keepsake means starting again, but a professional mock-up gets approved before a single thread touches the fabric.

Personalised baby pyjamas and baby sweatpants make popular gifts for a christening or a new arrival, stitched once and ready to wear rather than spending an evening at the hoop. For something that doesn’t wrap around a child at all, a personalised sublimation cushion cover suits a name, a date, or a short message just as well.
Every order starts with a design mock-up for approval before stitching begins, so you see exactly how the name will sit before committing. Turnaround depends on order size and the garment chosen, and pricing scales with quantity, colours, and garment type, larger orders typically cost less per item. Browse the full range and start a quote on the main ordering page whenever you’re ready.
Sources
- How to embroider names on clothes: expert techniques and tips
- How to embroider a name with a Brother embroidery machine (step by step)
FAQ
How much does it cost to have a name embroidered?
DIY hand embroidery costs very little beyond a basic kit of thread, needle, hoop, and stabiliser. Professional or print-on-demand services typically charge a one-time digitisation fee plus a per-item stitching cost, though bulk orders often reduce or waive the digitisation charge.
How can I embroider names by hand?
Hoop your fabric with a stabiliser underneath, transfer the name using tracing or a washable pen, then stitch the outline in backstitch for block letters or stem stitch for script. Finish threads by weaving them under existing stitches on the back rather than knotting.
What is the forbidden stitch in embroidery?
The “forbidden stitch” refers to a historical Chinese satin stitch technique so fine it reportedly caused embroiderers to lose their eyesight, hence the name. It isn’t a stitch used or recommended in modern name embroidery.
How do you embroider a name into fabric?
Choose a simple, rounded font at least 1cm tall, transfer it onto the fabric with a washable pen or transfer paper, then stitch the outline in backstitch, split stitch, or stem stitch depending on whether the letters are blocky or cursive. Add satin fill only on letters wide enough to hold clean, even coverage.


